회사에서 개발중인 앱의 psuh 알람을 개발하는 부분이 있어 개발하기 위해 자료를 찾았습니다.
일단 firebase와 안드로이드 클라이언트 부분은 완성되어 있다는 가정하에 node 서버를 적겠습니다.
혹시 그 전 단계를 안 하셨으면 아래 내용을 참조해주세요
2022.10.14 - [APP/안드로이드] - android firebase를 사용한 FCM push notification
android firebase를 사용한 FCM push notification
처음은 firsbase 에 접속하여 fcm 서비스를 신청하는 것입니다. https://console.firebase.google.com 로그인 - Google 계정 이메일 또는 휴대전화 accounts.google.com 시작하기 -> 프로젝트 만들기 를 선택합니..
jacorinne.tistory.com
firebase 에 들어가 생성한 프로젝트의 서비스 계정에 들어갑니다.
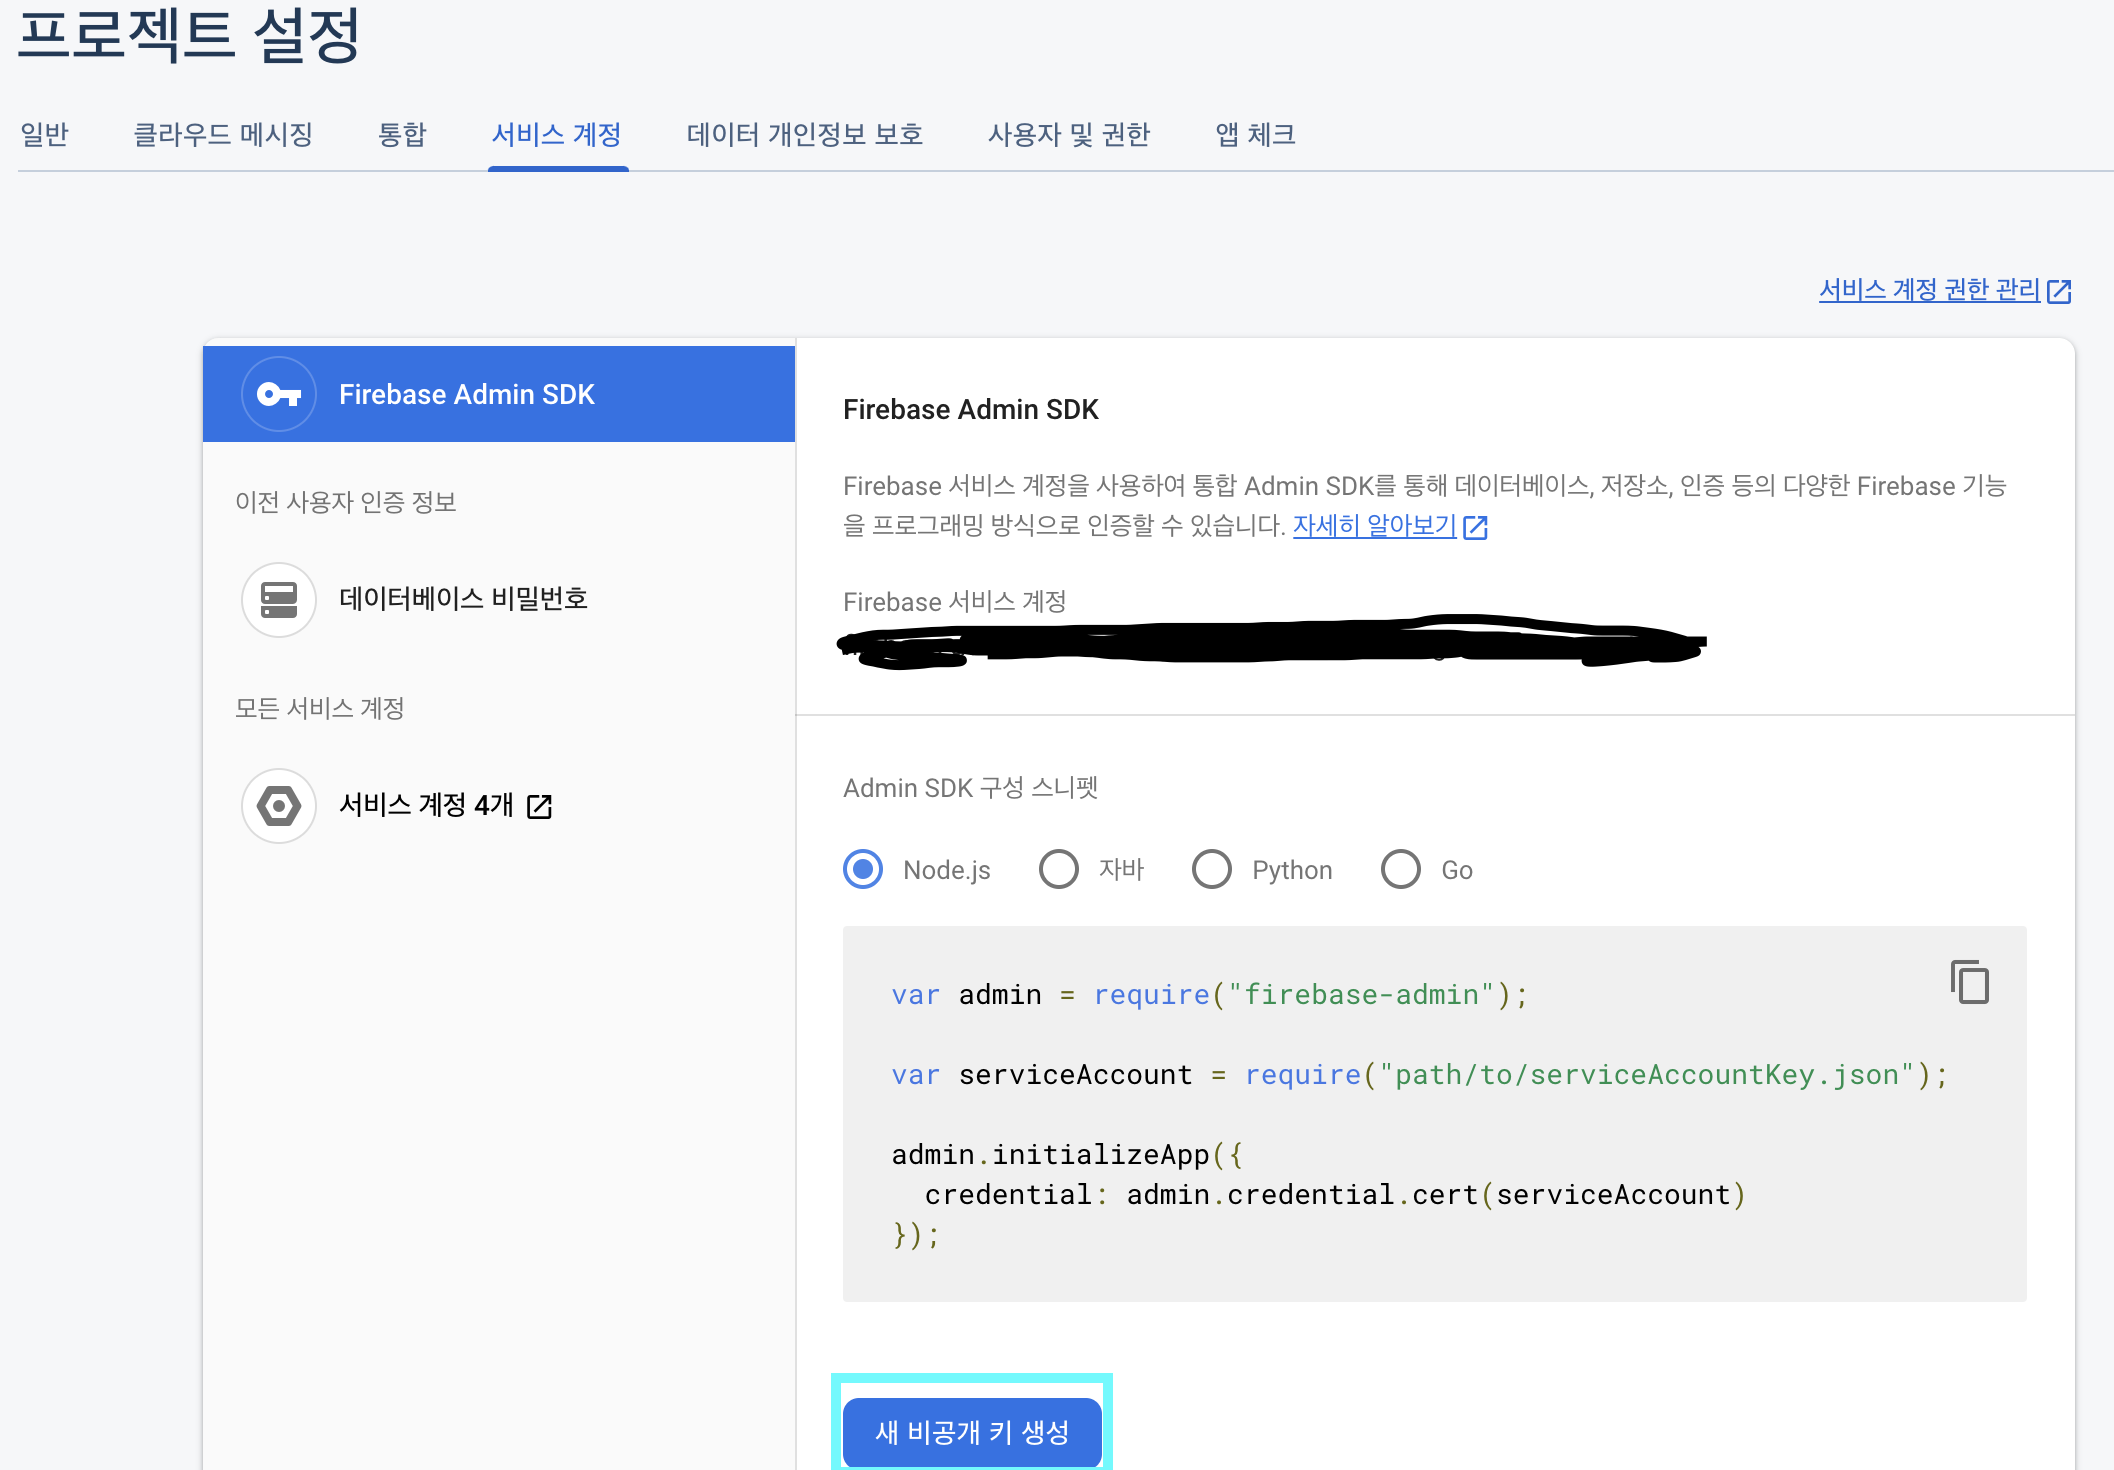
이제 아래의 '새 비공개 키 생성'을 눌러줍니다.
다운받은 json 파일을 node서버 폴더에 넣어줍니다.(express도 필요합니다.)

이제 서버에 필요한 라이브러리를 npm으로 다운받아야 합니다.(linux이시면 sudo 를 붙여주세요)
npm install firebase-admin --save
const express = require('express');
const app = express();

//fcm admin import
const admin = require("firebase-admin");

//firebase json file
var serviceAccount = require("./다운받은 json 파일.json");

admin.initializeApp({
  credential: admin.credential.cert(serviceAccount)
});

app.get('/pushTest', function (req, res) {
  //android device token
  const registrationToken = '안드로이드 토큰 내용';

  //send message content
  const message = {
    notification: {
      title: 'test',
      body: '실험이다요'
    },
    android: {
      notification: {
        //icon: '',
        color: '#7e55c3'
      }
    },
  token: registrationToken
  };

  // Send a message to the device corresponding to the provided
  admin
  .messaging()
  .send(message)
  .then((response) => {
    // Response is a message ID string.
    console.log('Successfully sent message:', response);
  })
  .catch((error) => {
    console.log('Error sending message:', error);
  });

});

var server = app.listen(3000, function () {
  // var host = server.address().address;
   var port = server.address().port;

  console.log('Server is working : PORT - ',port);
});

여기까지 하시면 잘 작동하는 것을 확인하실 수 있습니다.
제 글이 도움이 되셨으면 합니다. :)
감사합니다.
'BACK END > node.js' 카테고리의 다른 글
| node로 oEmbed만들기 (0) | 2022.04.13 |
|---|---|
| nodejs는 무엇일까 (0) | 2022.04.03 |