node-red서버에서 tcp통신은 매우 쉽게 만들 수 있습니다.
보통 언어에서는 socket을 열고 thread를 만들고 실행해주어야 합니다.(그 외에도 예외처리 등...)
하지만 node-red는 블록 2개면 tcp서버를 받고, 보내줄 수 있습니다.(보통은 MQTT를 추천합니다.)


이 두개의 블록을 사용하여 데이터를 tcp로 보내고 받을 수 있습니다.
일단 node-red 서버를 실행시키고 localhost:1880으로 들어옵니다.(기본 포트는 1880입니다.)
들어오면 오른쪽 위에 메뉴를 클릭하여 가져오기를 누르세요.

열린 창 안에 아래 JSON을 넣으시고 확인을 누르면 제가 만든 서버측 TCP블록이 생성됩니다.
[
    {
        "id": "303ed48cda1eef2c",
        "type": "http in",
        "z": "7691bb79083fbd8d",
        "name": "",
        "url": "/tcpTest",
        "method": "get",
        "upload": false,
        "swaggerDoc": "",
        "x": 250,
        "y": 120,
        "wires": [
            [
                "a36932a502c2a4ec",
                "b700cf84e8ae73dd"
            ]
        ]
    },
    {
        "id": "a36932a502c2a4ec",
        "type": "function",
        "z": "7691bb79083fbd8d",
        "name": "",
        "func": "msg.payload = \"test\";\nreturn msg;",
        "outputs": 1,
        "noerr": 0,
        "initialize": "",
        "finalize": "",
        "libs": [],
        "x": 500,
        "y": 220,
        "wires": [
            [
                "bd23f509793eb60b"
            ]
        ]
    },
    {
        "id": "bd23f509793eb60b",
        "type": "tcp out",
        "z": "7691bb79083fbd8d",
        "name": "",
        "host": "127.0.0.1",
        "port": "1888",
        "beserver": "client",
        "base64": false,
        "end": false,
        "tls": "",
        "x": 810,
        "y": 220,
        "wires": []
    },
    {
        "id": "b700cf84e8ae73dd",
        "type": "template",
        "z": "7691bb79083fbd8d",
        "name": "",
        "field": "payload",
        "fieldType": "msg",
        "format": "handlebars",
        "syntax": "mustache",
        "template": "This is the payload: {{payload}} !",
        "output": "str",
        "x": 500,
        "y": 100,
        "wires": [
            [
                "4a2937a241797f6e"
            ]
        ]
    },
    {
        "id": "4a2937a241797f6e",
        "type": "http response",
        "z": "7691bb79083fbd8d",
        "name": "",
        "statusCode": "",
        "headers": {},
        "x": 770,
        "y": 100,
        "wires": []
    }
]
클라이언트 측 TCP는 아래 JSON을 넣어주세요.
[
    {
        "id": "3e44d50f996c90a5",
        "type": "tab",
        "label": "tcpServer",
        "disabled": false,
        "info": "",
        "env": []
    },
    {
        "id": "47a5ad8b4a03e193",
        "type": "tcp in",
        "z": "3e44d50f996c90a5",
        "name": "",
        "server": "server",
        "host": "",
        "port": "1888",
        "datamode": "stream",
        "datatype": "buffer",
        "newline": "",
        "topic": "",
        "base64": false,
        "tls": "",
        "x": 500,
        "y": 160,
        "wires": [
            [
                "d20ad0a99e2c4d63"
            ]
        ]
    },
    {
        "id": "d20ad0a99e2c4d63",
        "type": "debug",
        "z": "3e44d50f996c90a5",
        "name": "",
        "active": true,
        "tosidebar": true,
        "console": false,
        "tostatus": false,
        "complete": "false",
        "statusVal": "",
        "statusType": "auto",
        "x": 870,
        "y": 160,
        "wires": []
    }
]
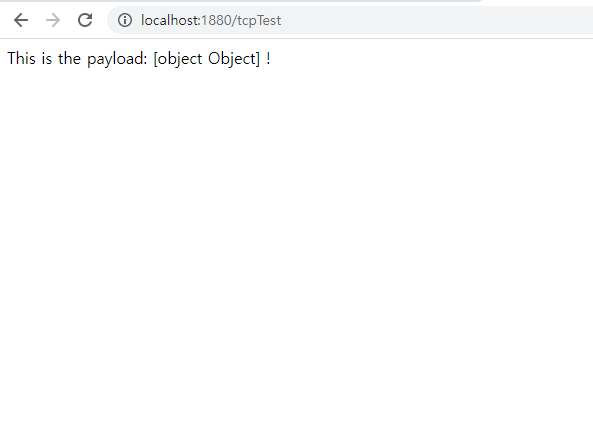
이제 http://localhost:1880/tcpTest 에 들어가시면 아래 사진처럼 나옵니다.
클라이언트 측 node-red창의 디버그 창에 아스키코드 값으로 데이터가 들어오는 것을 확인하실 수 있습니다.

이 외에도 MQTT서버, 제어 대쉬보드, 웹 서버(node-red는 기본적으로 머스타쉬 문법을 사용합니다.) 등으로 사용할 수 있습니다.
도움이 되셨으면 하고, 긴 글 읽어주셔서 감사합니다.
'개발일지 > node-red' 카테고리의 다른 글
| node-red는 무엇인가? (0) | 2022.06.20 |
|---|